


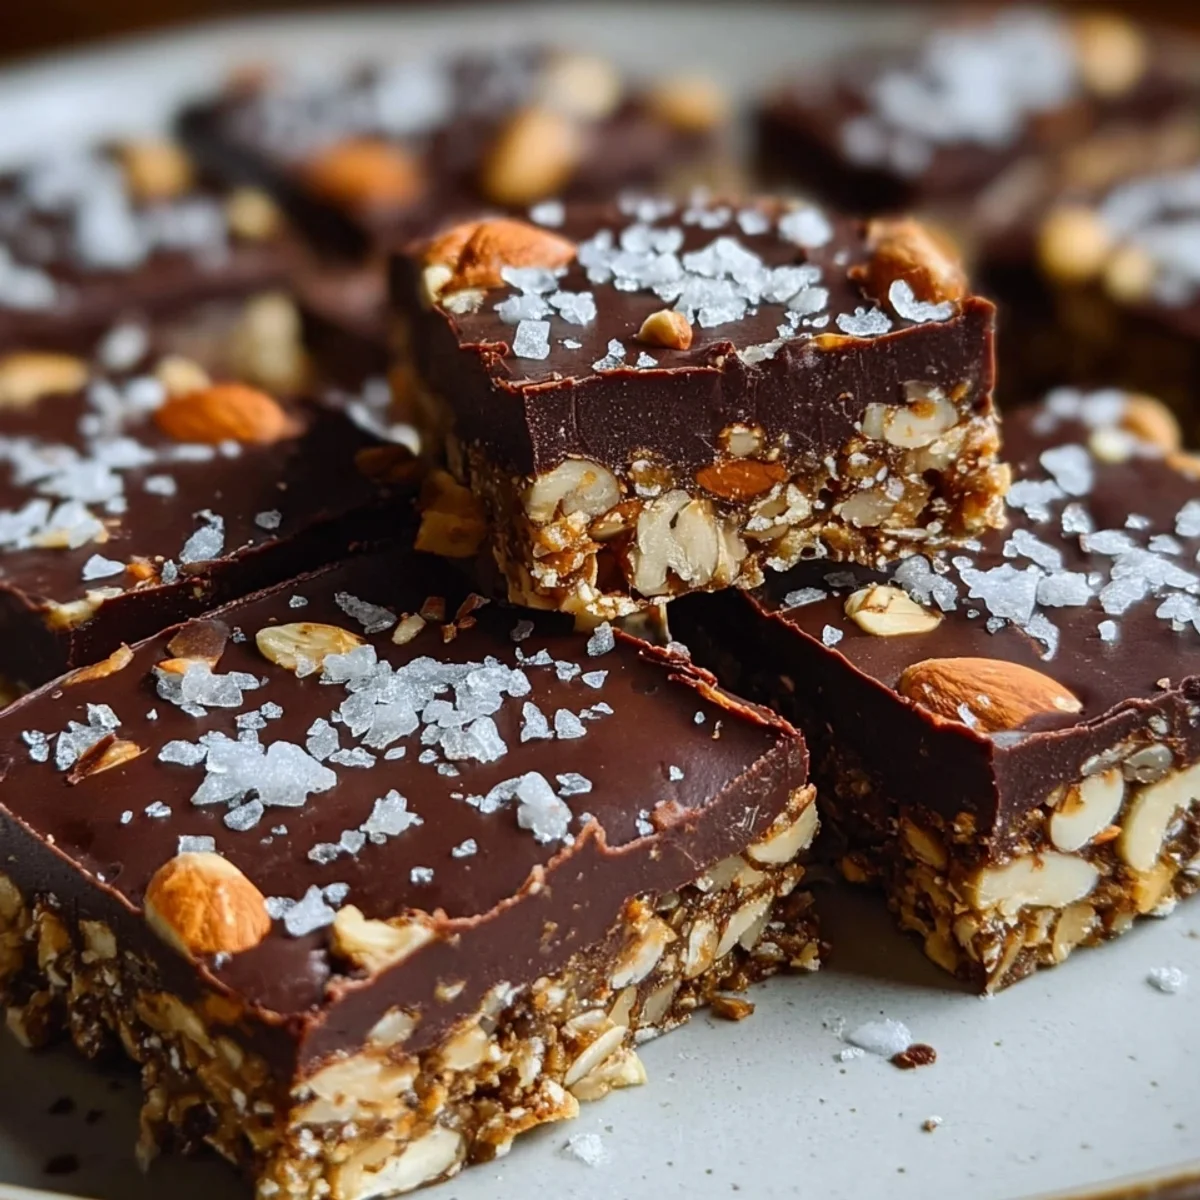
Healthy Dark Chocolate Sea Salt Nut Bars are a simple, no-bake snack. Packed with nuts, rich chocolate, and a hint of sea salt for a satisfying treat.
Okay, so picture this: busy morning, rushing out the door, and that familiar stomach rumble hits. I used to grab whatever, but then I stumbled upon a version of these Dark Chocolate Nut bars years ago. It was a game-changer! I started tinkering, adding my favorite nuts, perfecting the chewiness, and now, honestly, these bars are my go-to. They're quick, packed with goodness, and just hit the spot every single time.
Oh my goodness, I still laugh thinking about my first attempt at these Dark Chocolate Nut bars. I totally forgot to line the pan with parchment paper, thinking 'it'll be fine!' Nope. It was not fine. I ended up chiseling them out, and they looked more like abstract art than snack bars. Learn from my mistakes, friends, parchment paper is your bestie!
What You'll Need for These Delicious Dark Chocolate Nut Bars
- 1 cup raw almonds, 3/4 cup raw walnuts, 3/4 cup raw pecans, 1/2 cup raw pumpkin seeds: This nutty quartet is the backbone of our Dark Chocolate Nut bars! I love the variety of textures and flavors they bring. Almonds for that satisfying crunch, walnuts for their earthy richness, pecans for a buttery note, and pumpkin seeds for a little extra pop and healthy fats. To be real, you can play around with these, but this mix just sings together. Don't skip the raw part, we're not toasting them here, we want that pure, natural goodness.
- 2 tbsp chia seeds: These tiny powerhouses are incredible! Chia seeds act like a little binder, helping hold everything together in our Dark Chocolate Nut bars without needing any weird stuff. Plus, they pack a punch of omega-3s and fiber, which, let's be honest, we all need more of. They don't add much flavor, but they do a huge job behind the scenes, making these bars super satisfying and substantial.
- 1 cup pitted Medjool dates: Medjool dates are the secret to that amazing chewiness and natural sweetness. Seriously, don't skimp on good quality, soft dates here. They're like nature's caramel! They bind all those nuts and seeds together beautifully, giving our Dark Chocolate Nut bars their signature texture. If your dates feel a bit firm, a quick soak in warm water for 5-10 minutes can help soften them right up before blending.
- 1/2 cup creamy almond butter: Almond butter is another binding superstar and adds a wonderful richness. I always go for creamy, natural almond butter the kind where the only ingredient is almonds, maybe a little salt. It helps create that cohesive, slightly sticky base for our bars. You want it smooth, not chunky, for the best consistency. It's essential for that perfect chew in these Dark Chocolate Nut bars.
- 1/4 cup pure maple syrup: Maple syrup provides just a touch more sweetness and helps with the binding process, giving our bars a lovely subtle flavor. Make sure it's pure maple syrup, not the pancake kind with all the corn syrup. The real stuff makes a difference in both taste and how well these bars hold together. It complements the dates so well, creating a balanced sweetness that isn't overpowering.
- 2 tbsp coconut oil, melted, 1 tsp pure vanilla extract: The melted coconut oil is key for structure once chilled, helping the bars firm up nicely. And vanilla extract? Oh, it's like a warm hug in flavor form. It just rounds everything out, adding that little something extra that makes you go 'mmm.' Honestly, vanilla makes everything better, even simple Dark Chocolate Nut bars. Just a teaspoon does wonders for depth of flavor.
Crafting Your Own Dark Chocolate Nut Bars: A Step-by-Step Guide
- Step 1: Prepare Nut Base:
- First things first, grab your food processor. Toss in the almonds, walnuts, pecans, and pumpkin seeds. Give them a good pulse until they're coarsely chopped, but still have some texture. We're not making flour here, we want those satisfying chunks in our Dark Chocolate Nut bars! Transfer this mix to a big bowl. Then, stir in those magical chia seeds. They're going to do their binding thing later, trust me. This step sets the stage for all that nutty goodness.
- Step 2: Blend Wet Ingredients:
- Now for the sticky, sweet heart of these bars! In the same food processor (no need to wash it, yay!), add your pitted Medjool dates. Follow that with the creamy almond butter, pure maple syrup, melted coconut oil, and vanilla extract. Blend, blend, blend until you have a thick, sticky, uniform paste. It should look almost like a very thick caramel. This gooey mixture is what holds our delicious Dark Chocolate Nut bars together, so make sure it's super smooth.
- Step 3: Combine & Press:
- Alright, it's time to bring it all together! Scrape that lovely date mixture into the bowl with your chopped nuts and chia seeds. Now, get your hands in there (or use a sturdy spatula, but hands are more fun!). Mix it really well until everything is evenly coated and you have a cohesive, sticky dough. Press this glorious concoction firmly into your prepared 8x8 inch pan. I mean really press it down, like you're trying to make it part of the pan. This ensures your Dark Chocolate Nut bars won't crumble later.
- Step 4: Melt Dark Chocolate:
- Time for the star of the show! Grab your favorite dark chocolate chips or a chopped bar. I usually go for 70% cacao, but you do you. Melt it gently either in a microwave-safe bowl in 30-second bursts, stirring in between, or over a double boiler. You want it smooth and glossy, not scorched. This beautiful melted chocolate is what will elevate our simple nut bars into decadent Dark Chocolate Nut bars. Don't rush this part!
- Step 5: Drizzle & Sprinkle:
- Now for the fun part! Once your chocolate is perfectly melted, take a spoon and drizzle it all over the pressed nut base in the pan. Get creative with your swirls! Then, immediately, while the chocolate is still wet, sprinkle a generous pinch of flaky sea salt over the top. This salty-sweet combo is what makes these Dark Chocolate Nut bars so darn addictive. That little crunch of salt against the smooth chocolate? Oh, it's perfection.
- Step 6: Chill & Set:
- Patience, my friend, patience! This is the hardest part, honestly. Carefully transfer your pan to the refrigerator. Let it chill for at least 2-3 hours, or even better, overnight. This chilling time is crucial for the bars to firm up properly, allowing the coconut oil to set and the chocolate to harden. You want them nice and solid before cutting, so they hold their shape beautifully. No one wants crumbly Dark Chocolate Nut bars, right?
Making these Dark Chocolate Nut bars always brings a smile to my face. It's such a simple, forgiving recipe, and the smells that fill my kitchen are just divine earthy nuts, sweet dates, and that hint of melting dark chocolate. It feels good knowing I'm creating something wholesome and delicious for my family (and, let's be real, mostly for me!). It's a little kitchen therapy, honestly.
Keeping Your Dark Chocolate Nut Bars Fresh and Tasty
Okay, so you've made a batch of these glorious Dark Chocolate Nut Bars now how to keep them fresh? I usually store mine in an airtight container in the fridge. They'll stay good for up to two weeks, though honestly, they never last that long in my house! If you want them to last even longer, you can freeze them for up to 2-3 months. Just make sure they're in a freezer-safe bag or container, with parchment paper between layers to prevent sticking. I once forgot to separate them and ended up with a giant frozen Dark Chocolate Nut Bar slab oops!

Playing with Ingredients: Swapping for Your Perfect Dark Chocolate Nut Bars
I've played around with these Dark Chocolate Nut Bars so many times! If you don't have all the nuts, feel free to swap them out. Almonds, cashews, walnuts, pecans any combo works! Just keep the total nut/seed volume roughly the same. Not a fan of almond butter? Peanut butter or cashew butter works beautifully, though it will change the flavor profile a bit. For the sweetener, you could try honey or agave nectar instead of maple syrup, but I do love that maple flavor. Just remember, these swaps might slightly alter the texture, so adjust if needed!
How to Serve Your Homemade Dark Chocolate Nut Bars
These Dark Chocolate Nut Bars are amazing on their own, a perfect pick-me-up any time of day. I love grabbing one with my morning coffee it's like a little breakfast treat that actually fuels me. They're also fantastic crumbled over a bowl of Greek yogurt with some fresh berries for a quick dessert or a more substantial snack. Or, break them into smaller pieces and serve them on a platter with other healthy bites when friends come over. They look fancy but are secretly so easy to make!
The Sweet Story Behind These Dark Chocolate Nut Bars
While these specific Dark Chocolate Nut Bars are my own spin, the concept of nut and fruit bars has roots in so many cultures! Think about energy bars made from dried fruits and nuts that travelers and warriors carried for centuries, from ancient Middle Eastern date and nut pastes to European fruit leathers. My version is a modern American take, inspired by the health food movement and a desire for convenient, wholesome snacks that still taste amazing. It's about taking those ancient ideas of natural fuel and making them fit into our busy lives.
And there you have it, friends! My absolute favorite recipe for Dark Chocolate Nut Bars. These are so much more than just a snack, they're a little bite of wholesome happiness. I hope you love them as much as I do. Give them a try, make them your own, and don't forget to share your creations (and any kitchen mishaps!) with me in the comments below!

Burning Questions About Dark Chocolate Nut Bars, Answered!
- Can I use a different type of nut butter?
Yes, for sure! Peanut butter or cashew butter would work great in these Dark Chocolate Nut Bars. Just make sure it's a creamy, natural variety without a ton of added sugar. The flavor will change a bit, obviously, but it'll still be super delicious and hold together well.
- Are these bars gluten-free?
Yep, these Dark Chocolate Nut Bars are naturally gluten-free! All the ingredients nuts, seeds, dates, almond butter, maple syrup, coconut oil, and dark chocolate are typically gluten-free. Just double-check your labels, especially on your chocolate chips, to be absolutely sure if you have a severe allergy.
- Can I make these without a food processor?
Honestly, a food processor makes these Dark Chocolate Nut Bars SO much easier! You could try chopping the nuts by hand very finely and mashing the dates with a fork, but it would be a lot more work to get that cohesive, sticky base. I'd really recommend borrowing a food processor if you don't have one.
- How do I prevent the chocolate from cracking when cutting?
Ah, the dreaded chocolate crack! The best way to avoid this with your Dark Chocolate Nut Bars is to let them sit out of the fridge for about 10-15 minutes before cutting. This lets the chocolate soften just a tiny bit. Also, use that warm, sharp knife trick I mentioned earlier it really helps!
- Can I add other mix-ins to the base?
Absolutely! That's the beauty of these Dark Chocolate Nut Bars. I've sometimes thrown in a handful of shredded coconut, dried cranberries, or even a pinch of cinnamon for extra flavor. Just don't add too much, or it might affect how well the bars hold together. Start small and experiment!
Dark Chocolate Sea Salt Nut Bars: Easy Healthy Snack
Healthy Dark Chocolate Sea Salt Nut Bars are a simple, no-bake snack. Packed with nuts, rich chocolate, and a hint of sea salt for a satisfying treat.
Ingredients
Hearty Nut & Seed Base
- 1 cup raw almonds
- 3/4 cup raw walnuts
- 3/4 cup raw pecans
- 1/2 cup raw pumpkin seeds
- 2 tbsp chia seeds
Sweet & Sticky Binder
- 1 cup pitted Medjool dates
- 1/2 cup creamy almond butter
- 1/4 cup pure maple syrup
- 2 tbsp coconut oil, melted
- 1 tsp pure vanilla extract
Decadent Dark Chocolate Drizzle
- 3/4 cup dark chocolate chips (70% cacao or higher)
Finishing Touch
- 1/2 tsp flaky sea salt, plus extra for sprinkling
Instructions
-
1Prepare Nut BaseCombine 1 cup raw almonds, 3/4 cup raw walnuts, 3/4 cup raw pecans, 1/2 cup raw pumpkin seeds, and 2 tbsp chia seeds in a food processor. Pulse until coarsely chopped, ensuring a good texture for your Dark Chocolate & Sea Salt Nut Bars: Easy Healthy Snack.
-
2Blend Wet IngredientsIn the food processor, add 1 cup pitted Medjool dates, 1/2 cup creamy almond butter, 1/4 cup pure maple syrup, 2 tbsp melted coconut oil, and 1 tsp pure vanilla extract. Process until a thick, sticky paste forms.
-
3Combine & PressTransfer the chopped nut mixture to a large bowl. Add the date-almond butter mixture and mix thoroughly until well combined. Press firmly into an 8x8-inch pan lined with parchment paper, creating an even layer for your Dark Chocolate & Sea Salt Nut Bars: Easy Healthy Snack.
-
4Melt Dark ChocolateIn a microwave-safe bowl, melt 3/4 cup dark chocolate chips (70% cacao or higher) in 30-second intervals, stirring until smooth. Alternatively, use a double boiler for gentle melting, ensuring it's completely fluid for drizzling.
-
5Drizzle & SprinkleDrizzle the melted dark chocolate evenly over the pressed nut bar base. Immediately sprinkle 1/2 tsp flaky sea salt over the chocolate. This adds a crucial flavor element to your Dark Chocolate & Sea Salt Nut Bars: Easy Healthy Snack.
-
6Chill & SetPlace the pan in the refrigerator for at least 2 hours, or until the bars are firm and the chocolate has fully set. This step is essential for easy cutting and a stable bar texture.
-
7Cut & ServeOnce chilled, lift the bars from the pan using the parchment paper. Cut into 12 equal bars. Sprinkle with extra flaky sea salt if desired, then serve and enjoy these delicious Dark Chocolate & Sea Salt Nut Bars: Easy Healthy Snack.
Notes
Store leftover Dark Chocolate & Sea Salt Nut Bars in an airtight container in the refrigerator for up to 1 week, or freeze for up to 1 month.
Feel free to customize the nut base! You can swap out some almonds, walnuts, or pecans for cashews, pistachios, or even sunflower seeds.
For an extra layer of flavor, lightly toast the raw nuts and seeds in a dry pan for 5-7 minutes before processing. Let them cool completely.
For cleaner cuts, run your knife under hot water and wipe it dry between each slice. This helps prevent the chocolate from cracking.
Equipment
Please check ingredients for potential allergens and consult a health professional if in doubt.
Nutrition Facts
It is important to consider this information as approximate and not to use it as definitive health advice.
Comments
Leave a Comment